Cosmostreamer settings
Cosmostreamer settings available in web interface, in CosmoViewerNG application for Windows and in CosmoViewerNG application for Mac.
Settings are the same, in this document I will use a web interface for the screenshots.
How to open Cosmostreamer device settings
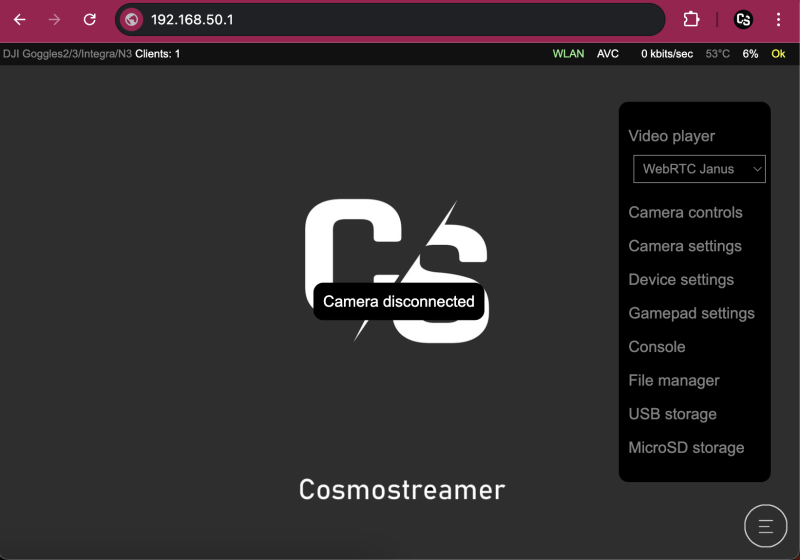
Web interface
Click icon in the right bottom corner and choose "Device settings" item in the menu.
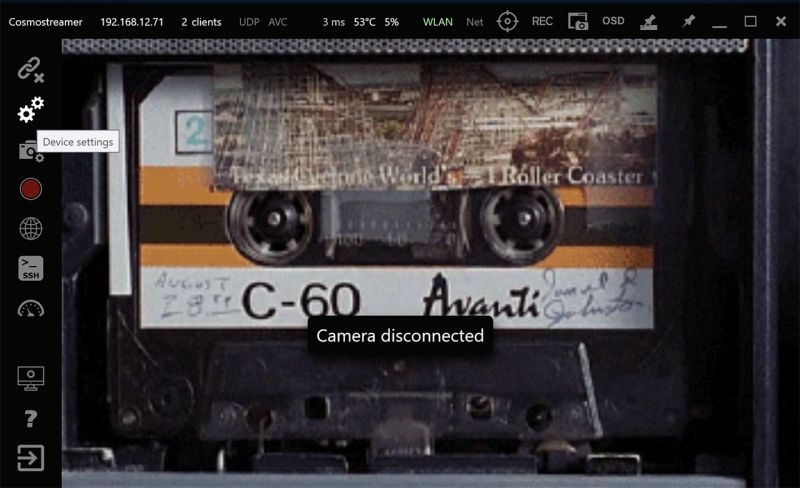
CosmoViewerNG for Windows
Connect PC to the Cosmostreamer device, then click icon with gears in the left panel (second from the top).
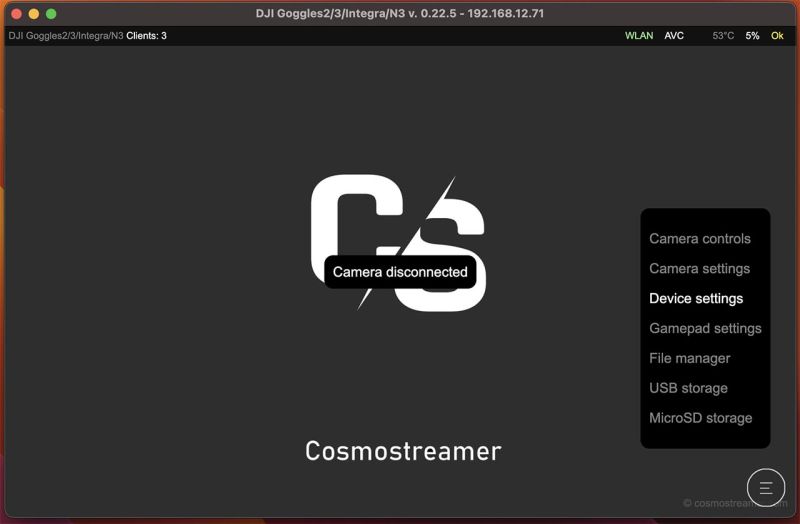
CosmoViewertNG for Mac
Connect Mac to the Cosmostreamer device, then click icon in the right bottom corner and choose "Device settings" item in the menu.
Settings Chapters
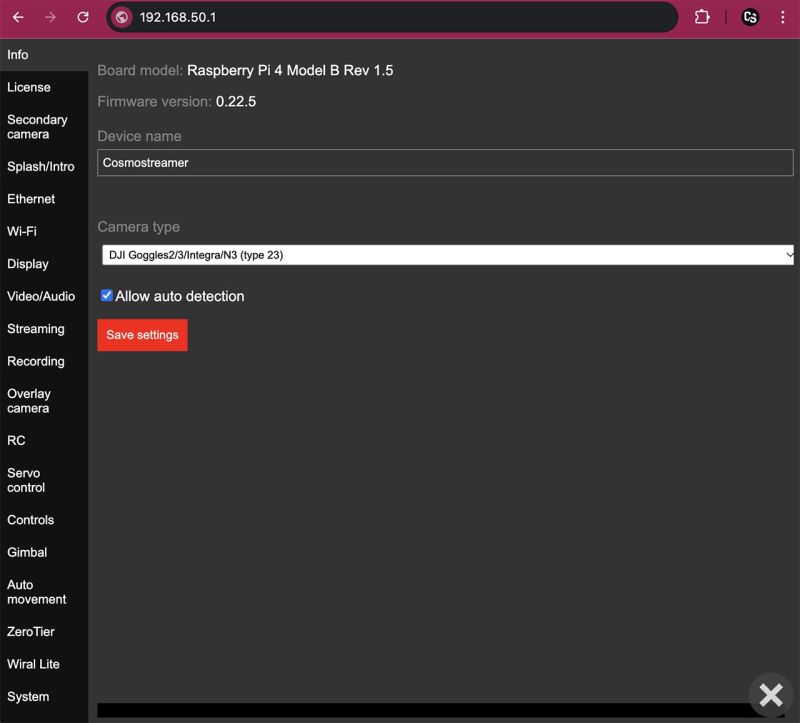
Info
Board model
Microcomputer model (Raspberry Pi model and revision)
Firmware version
Current version of Cosmostreamer
Device name
A human-readable name of the device, used in the device list in CosmoViewerNG app
Camera type
For historical reasons, all devices that work with the Cosmostreamer are referred to as a "Camera" - even if the device is not actually a camera, but, for example, a pair of DJI goggles, or DJI SDR receiver, or any other supported device. So let's say this is a "license type".
Allow auto detection
This option is shown only for certain "Camera types," such as DJI Goggles or DJI Fly drones. When enabled, Cosmostreamer attempts to automatically detect the connected camera type and switch to the appropriate "Camera type" making manual switching unnecessary.
Need to disable this option (if enabled) before changing or entering a new license key!
License
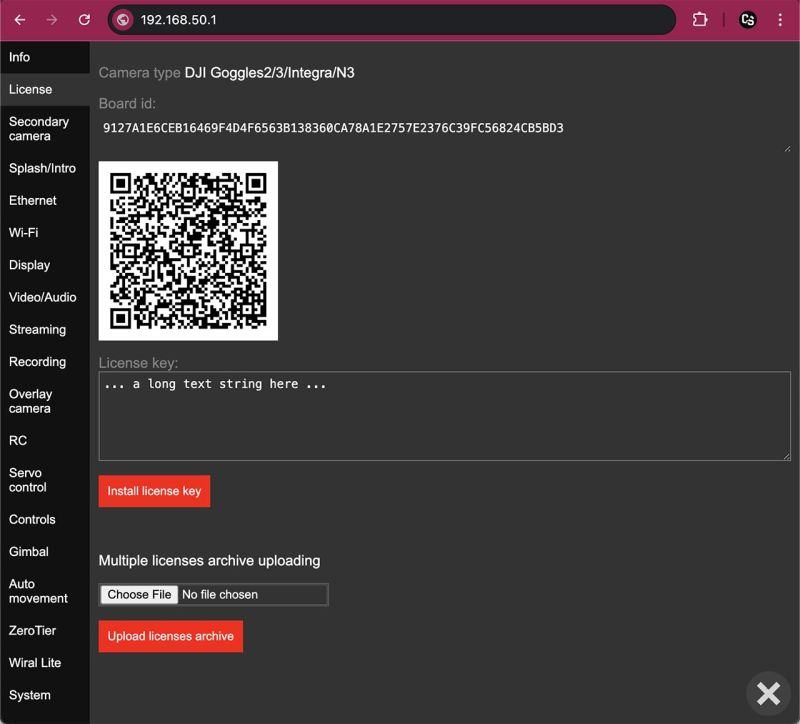
Camera type
Current "Camera type" choosen in chapter "Info".
Board ID
A hex-string, unique for each Raspberry Pi or any other microcontroller used for Cosmostreamer. Board ID never changes on the same Raspberry Pi after firmware update or any other manipulations.
QR code
Image contains Board ID and current firmware version in text form like this:
board_id=9127A1E6CEB16469F4D4F6563B138360CA78A1E2757E2376C39FC56824CB5BD3;app_type=23;ver=0.22.5;new=1
License key
Text string with the license key for current "Camera type" and Board ID. License keys stored independently for each "Camera type".
License key CAN'T be transfered from one Raspberry Pi to another!!!
"Install license key" button
Click on this button and entered key will be saved on microSD.
Multiple licenses archive uploading
May be used for uploading a .csuf file with two or more license keys inside.
Secondary camera
It's possible to use a two "Camera types" at the same time, but with some limitations and not for any type of the device. Only video will be available from this camera, no control, no telemetry.
For example, possible to use "DJI Goggles2/3/Integra/N3" and "DJI Goggles V1/V2" together. Or "DJI Goggles2/3/Integra/N3" and a "Webcam".
Not all combinations of main and secondary cameras have been tested!
Tested only on Raspberry Pi 4!
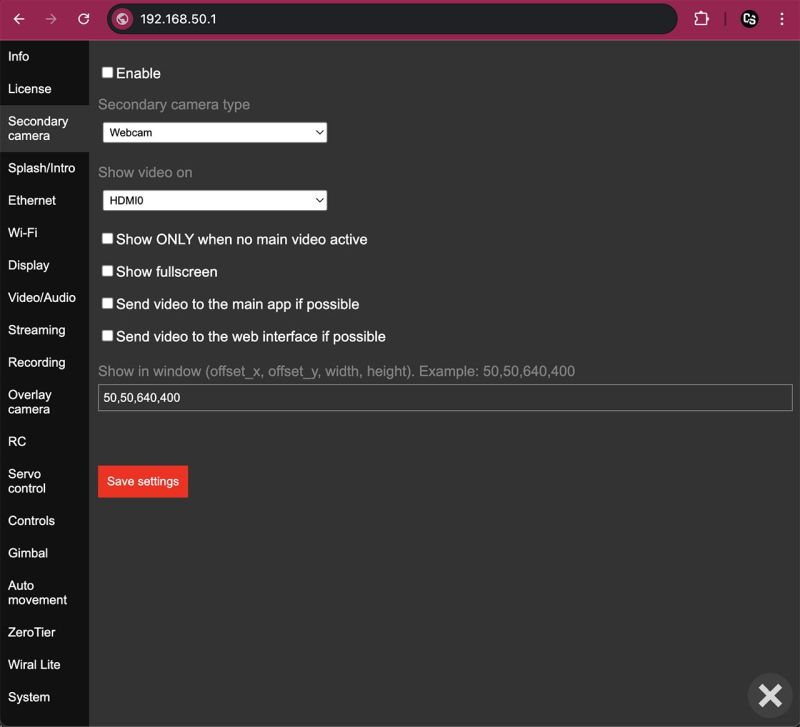
Enable
Enable/disable secondary camera.
Secondary camera type
The same as a "Camera type" in chapter "Info", but here are not all types in this list.
At current time available options:
- DJI Goggles V1/V2
- DJI Goggles2/3/Integra/N3
- RTMP Receiver
- Webcam
- Cosmostreamer Remote Client (license is not needed)
Before using in this list need to enter license for this "Camera type" as when it used as a main camera!
Show video on
Video port used for the secondary camera. HDMI-0, HDMI-1 or DSI.
Video may be full-screen on windowed (check next params).
Show ONLY when no main video active
As the name of this option suggests, video from the secondary camera will be shown only when the main camera is inactive.
Main use case - show video from a webcam when DJI Goggles2 is disconnected.
Show fullscreen
Show video from the secondary camera in a full-screen mode on the video port choosen in option "Show video on".
If this option disabled - video will be shown in a widow. Size and position of this window configurable in parameter "Show in window".
Send video to the main app if possible
If video stream from the secondary camera is in H264 or H265 codec - this video stream can be sent to the CosmoViewerNG application, it will look as a small window over the main video.
Send video to the web interface if possible
If video stream from the secondary camera is in H264 codec - this video stream can be sent to the web interface, it will look as a small window over the main video.
Show in window
When option "Show fullscreen" is disabled - video will be shown in a widow. This parameter is for window position and size.
For example, "50,60,640,400" - means 50 pixels offset from the left side of display border, 60 pixels offset from the top, 640 pixels is the width of the window and 400 pixels is height of the window.
Splash/Intro
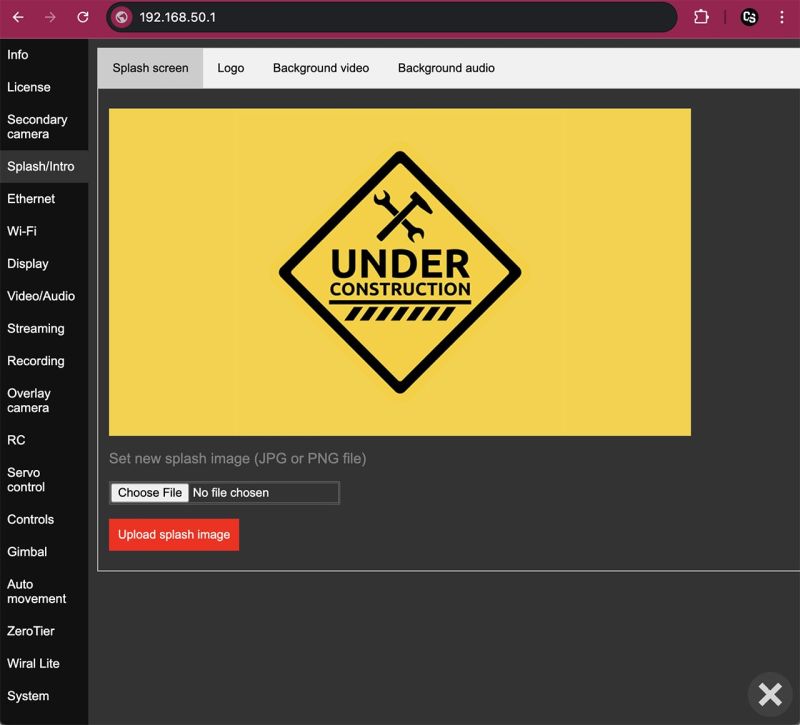
Tab "Splash screen"
Splash screen - it's like a wallpaper. Any standard JPG or PNG image up to 1920x1080 pixels resolution. This Image will be shown on all connected displays when no active video from the main camera. On this settings page possible to upload a new splash screen image file.
Default splash screen file with Cosmostreamer logo (C/S) can be downloaded here
Tab "Logo"
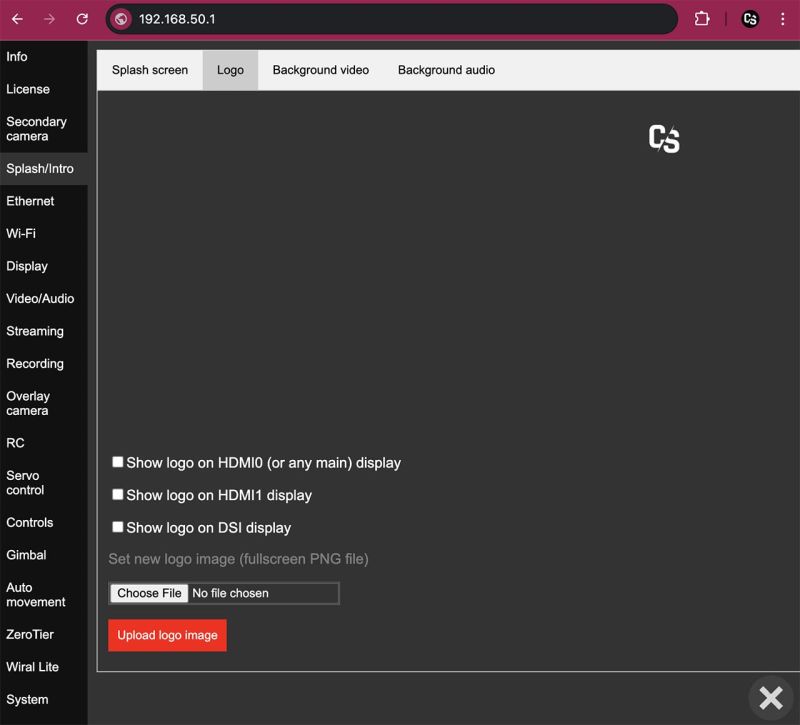
"Logo" is simply an additional image file (PNG with a transparent background). It is displayed in fullscreen mode on top of all other media — including the splash screen, background video, or main camera video — so it is always visible. You can use it to overlay your own logo on the video.
Instead of setting a logo position I made more simple - this logo image is shown as a fullscreen, so you could just choose plase for your small logo in any image editor.
Tab "Background video"
Tab "Background audio"
