CosmoViewerNG for Windows
Main client application for Cosmostreamer NG. Allows to change Cosmostreamer settings, control camera with video stream, etc.
Also CosmoViewerNG for Windows can work with some types of cameras directly with Wi-Fi or USB connection to PC.
Cosmostreamer connection
Connect your PC/laptop to the Wi-Fi network "cosmostreamer", default password is "1234512345" or connect your PC/laptop to the local network with Ethernet cable. Cosmostreamer device must be discovered and shown in list. Click on it for connection.
Direct connection to cameras and other devices
DJI Osmo / Osmo+ / Osmo Pro / Osmo RAW
DJI Pocket Osmo
DJI Pocket 2
DJI Osmo Action
DJI FPV Goggles
DJI Raven Eye
Insta360
Insta360 EVO and Insta360 X2 tested. Other models should also work, but they need to be tested and confirmed.
Insta360 EVO can be connected only with Wi-Fi. Insta360 X2 can be connected with Wi-Fi or with USB cable.
Connection to camera
Wi-Fi connection
Just connect your PC Wi-Fi to Insta360 camera Wi-Fi network. Default password for EVO is 12345678, default password for X2 is 88888888.
Note: be carefull! The password on these Insta360 cameras cannot be changed even in the official app, so any of your neighbors can access your camera and, possible, to your PC if it connected to camera Wi-Fi. Discussion on Reddit
USB connection
- Switch USB mode on Insta360 X2 to "Android" (Swipe from up to down on Insta360 X2 display, swipe from right to left, click gears icon, menu "General" -> "USB mode", choose "Android")
- Connect your Insta360 X2 to PC with a standard USB-C cable.
- In some cases also need to instal WinUSB driver, follow next steps
- Download Zadig application
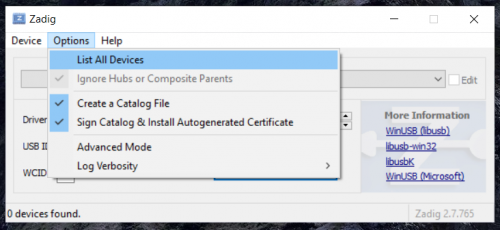
- Run Zadig and open menu Settings -> List All Devices
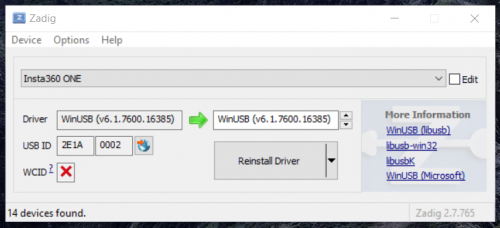
- Choose "Insta360 ONE" in list and click "Install driver" or "Reinstall driver" button
Configuring CosmoViewerNG
- Run CosmoViewerNG application on PC
- Click "Application settings" icon (3rd icon from bottom in left panel)
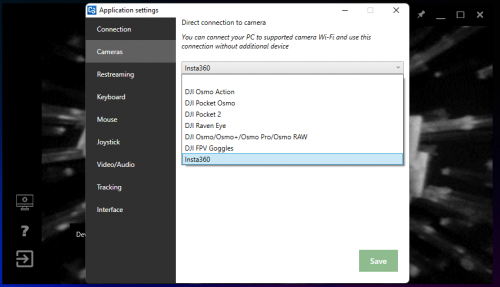
- Go to chapter "Cameras". Choose "Insta360" in list and click "Save"
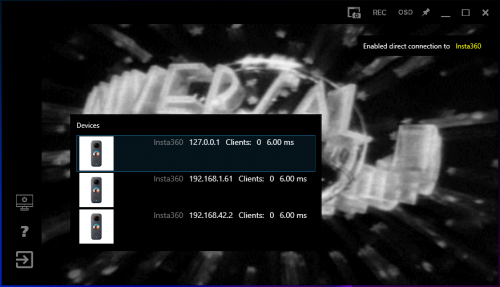
- One or more devices should be found in list (the same camera but on diffent network interfaces)
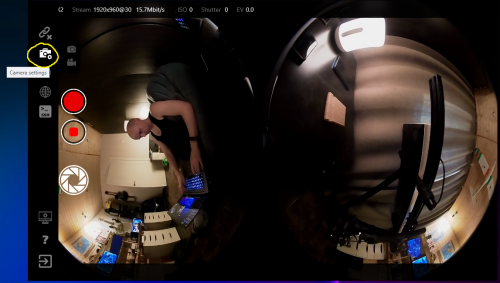
- Click any device (better to use device with address "127.0.0.1") and you should see video if camera already connected. Settings available as "gears" icon in left panel
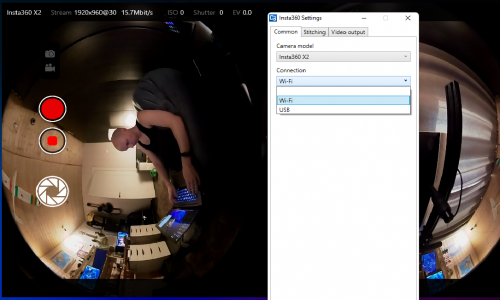
- In settings change connection type (Wi-Fi or USB)
Changing preview resolution
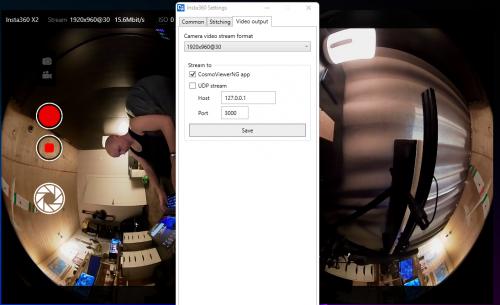
Click "Camera settings" icon, tab "Video output". Change resolution in list. Click on "Save" button is not needed
Real-time panorama stitching
NVidia graphics card ONLY (at current moment)
Most important feature - real-time stitching from two fisheyes into equirectangular format. It's strongly needed if you want to stream on Youtube. Unfortunately, Insta360 EVO and X2 does not support onboard stitching. Native Insta360 application can do stitching, but resolution is limited on 1280s. CosmoViewerNG can do stitching in 4K resolution (3840x1920) up to 60 FPS, but powerfull graphics card is needed for encoding stitched video in H264 codec. For example, my GTX 1650 SUPER is well fast for do 4K stitching on 30 FPS with a small latency, but in 60 FPS latency is big.
- Click "Camera settings" icon, tab "Stitching"
Downloads
