Cosmostreamer settings
Cosmostreamer settings available in web interface, in CosmoViewerNG application for Windows and in CosmoViewerNG application for Mac.
Settings are the same, in this document I will use a web interface for the screenshots.
How to open Cosmostreamer device settings
Web interface
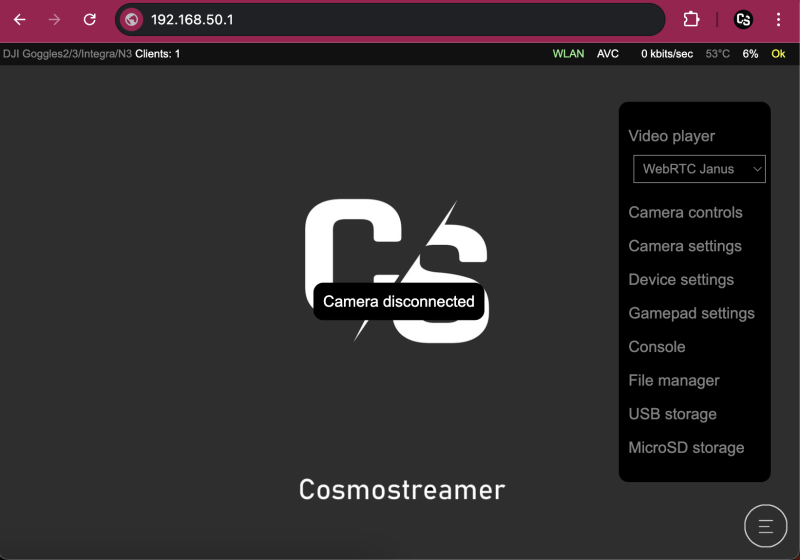
Click icon in the right bottom corner and choose "Device settings" item in the menu.
CosmoViewerNG for Windows
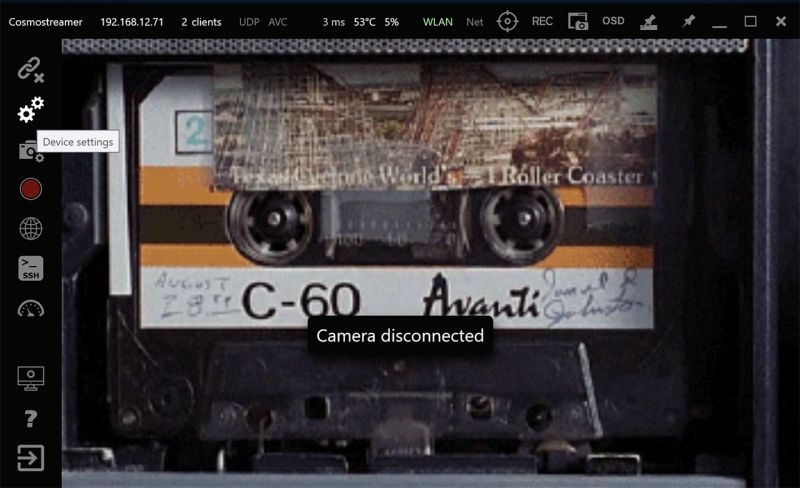
Connect PC to the Cosmostreamer device, then click icon with gears in the left panel (second from the top).
CosmoViewertNG for Mac
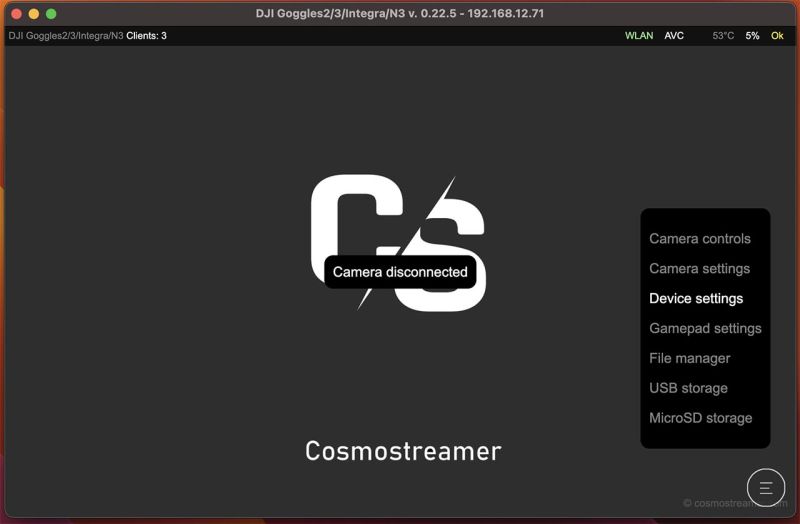
Connect Mac to the Cosmostreamer device, then click icon in the right bottom corner and choose "Device settings" item in the menu.
Settings Chapters
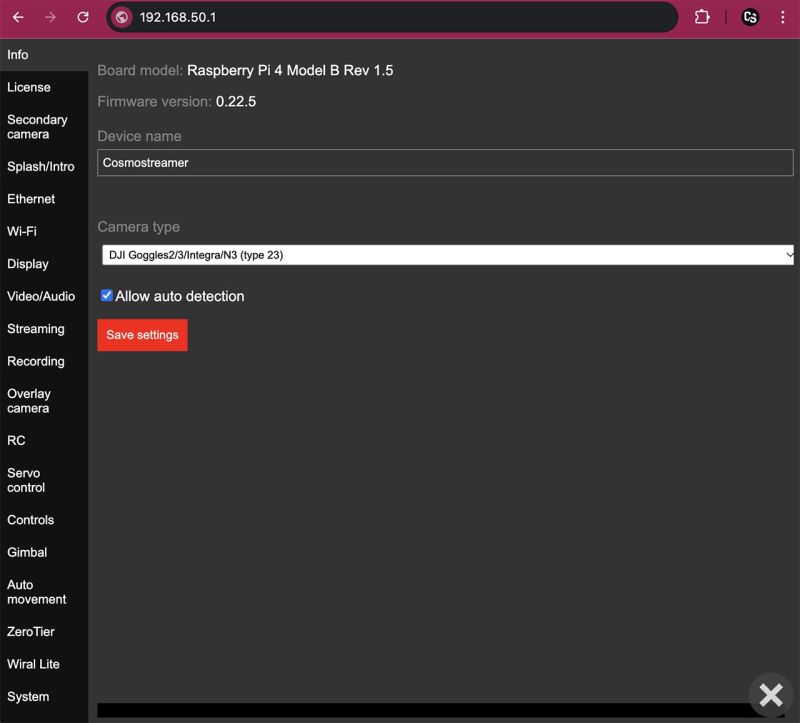
Info
Board model
Microcomputer model (Raspberry Pi model and revision)
Firmware version
Current version of Cosmostreamer
Device name
A human-readable name of the device, used in the device list in CosmoViewerNG app
Camera type
For historical reasons, all devices that work with the Cosmostreamer are referred to as a "Camera" - even if the device is not actually a camera, but, for example, a pair of DJI goggles, or DJI SDR receiver, or any other supported device. So let's say this is a "license type".
Allow auto detection
This option is shown only for certain "Camera types," such as DJI Goggles or DJI Fly drones. When enabled, Cosmostreamer attempts to automatically detect the connected camera type and switch to the appropriate "Camera type" making manual switching unnecessary.
Need to disable this option (if enabled) before changing or entering a new license key!
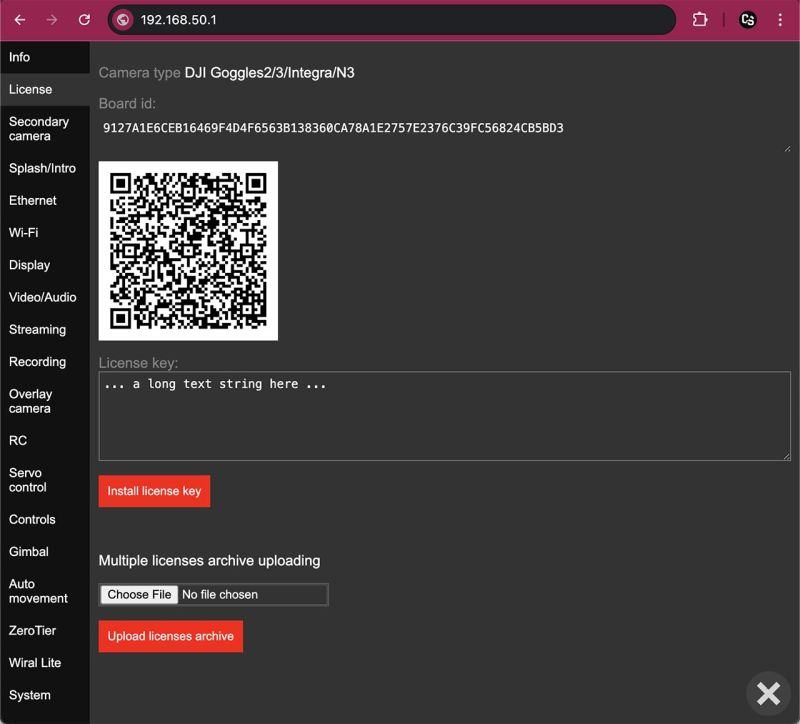
License
Camera type
Current "Camera type" choosen in chapter "Info".
Board ID
A hex-string, unique for each Raspberry Pi or any other microcontroller used for Cosmostreamer. Board ID never changes on the same Raspberry Pi after firmware update or any other manipulations.
QR code
Image contains Board ID and current firmware version in text form like this:
board_id=9127A1E6CEB16469F4D4F6563B138360CA78A1E2757E2376C39FC56824CB5BD3;app_type=23;ver=0.22.5;new=1
License key
Text string with the license key for current "Camera type" and Board ID. License keys stored independently for each "Camera type".
License key CAN'T be transfered from one Raspberry Pi to another!!!
"Install license key" button
Click on this button and entered key will be saved on microSD.
Multiple licenses archive uploading
May be used for uploading a .csuf file with two or more license keys inside.
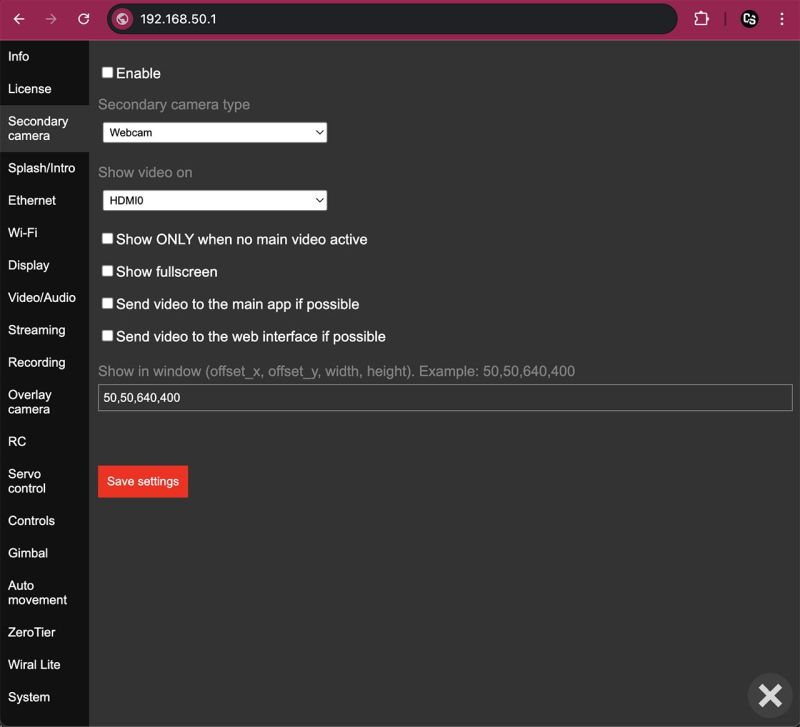
Secondary camera
It's possible to use a two "Camera types" at the same time, but with some limitations and not for any type of the device. Only video will be available from this camera, no control, no telemetry.
For example, possible to use "DJI Goggles2/3/Integra/N3" and "DJI Goggles V1/V2" together. Or "DJI Goggles2/3/Integra/N3" and a "Webcam".
Not all combinations of main and secondary cameras have been tested!
Tested only on Raspberry Pi 4!
Enable
Enable/disable secondary camera.
Secondary camera type
The same as a "Camera type" in chapter "Info", but here are not all types in this list.
At current time available options:
- DJI Goggles V1/V2
- DJI Goggles2/3/Integra/N3
- RTMP Receiver
- Webcam
- Cosmostreamer Remote Client (license is not needed)
Before using in this list need to enter license for this "Camera type" as when it used as a main camera!
Show video on
Video port used for the secondary camera. HDMI-0, HDMI-1 or DSI.
Video may be full-screen on windowed (check next params).
Show ONLY when no main video active
As the name of this option suggests, video from the secondary camera will be shown only when the main camera is inactive.
Main use case - show video from a webcam when DJI Goggles2 is disconnected.
Show fullscreen
Show video from the secondary camera in a full-screen mode on the video port choosen in option "Show video on".
If this option disabled - video will be shown in a widow. Size and position of this window configurable in parameter "Show in window".
Send video to the main app if possible
If video stream from the secondary camera is in H264 or H265 codec - this video stream can be sent to the CosmoViewerNG application, it will look as a small window over the main video.
Send video to the web interface if possible
If video stream from the secondary camera is in H264 codec - this video stream can be sent to the web interface, it will look as a small window over the main video.
Show in window
When option "Show fullscreen" is disabled - video will be shown in a widow. This parameter is for window position and size.
For example, "50,60,640,400" - means 50 pixels offset from the left side of display border, 60 pixels offset from the top, 640 pixels is the width of the window and 400 pixels is height of the window.
Splash/Intro
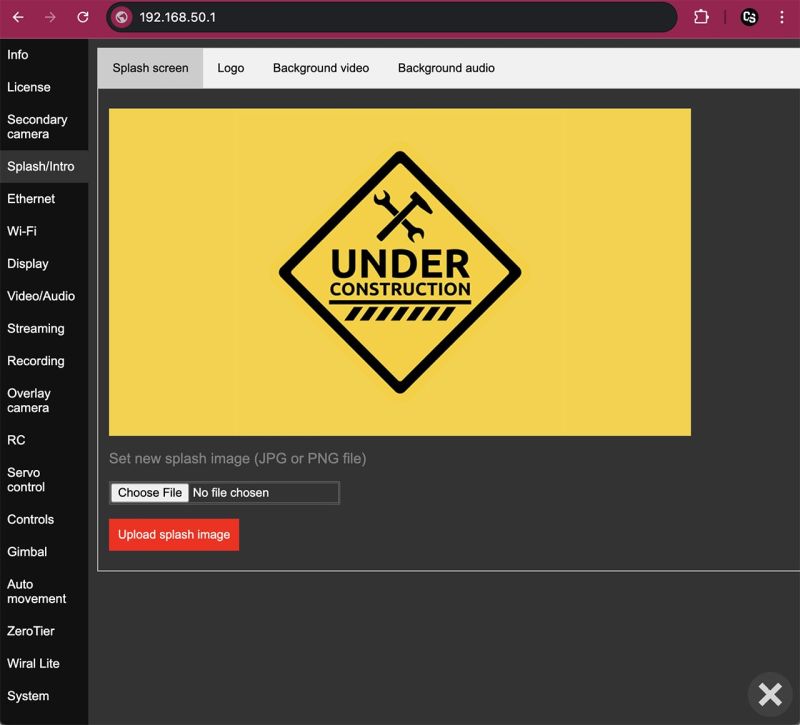
Tab Splash screen
Splash screen - it's like a wallpaper. Any standard JPG or PNG image up to 1920x1080 pixels resolution. This Image will be shown on all connected displays when no active video from the main camera. On this settings page possible to upload a new splash screen image file.
Default splash screen file with Cosmostreamer logo (C/S) can be downloaded here
Tab Logo
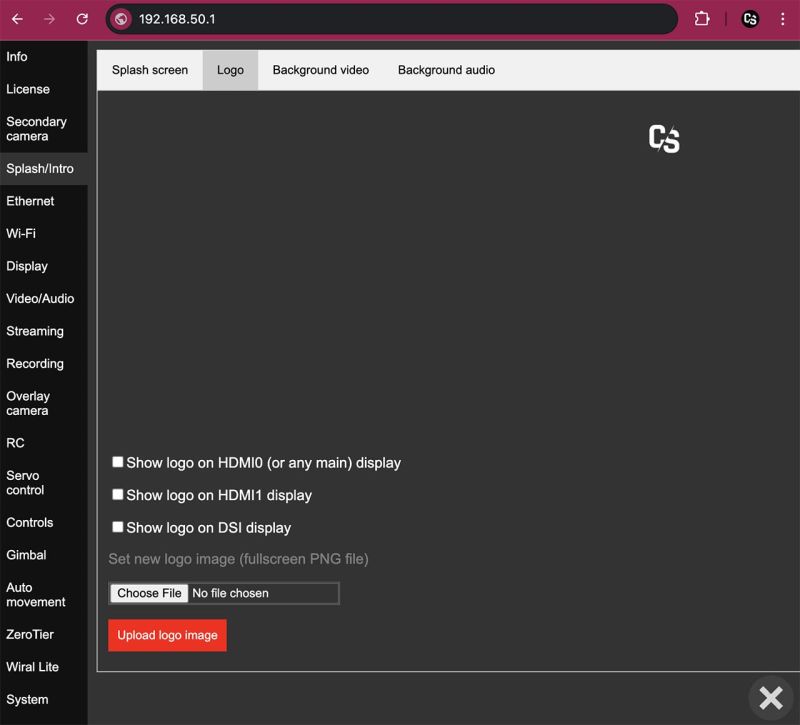
"Logo" is simply an additional image file (PNG with a transparent background). It is displayed in fullscreen mode on top of all other media including the splash screen, background video, or main camera video - so it is always visible. You can use it to overlay your own logo on the video.
Instead of implementing logo positioning, I chose a simpler approach — the logo image is displayed fullscreen, so you can place your small logo wherever you want using any image editor.
One additional use case - safe zones. You could use a pre-made PNG image with a black (or with a custom transparency) in needed zones.
Available parameters - just what video output use for showing a logo image.
Possible to use only two video ports for the logo!!!
Demo here: https://www.instagram.com/p/Cy0NVIqrCT6/
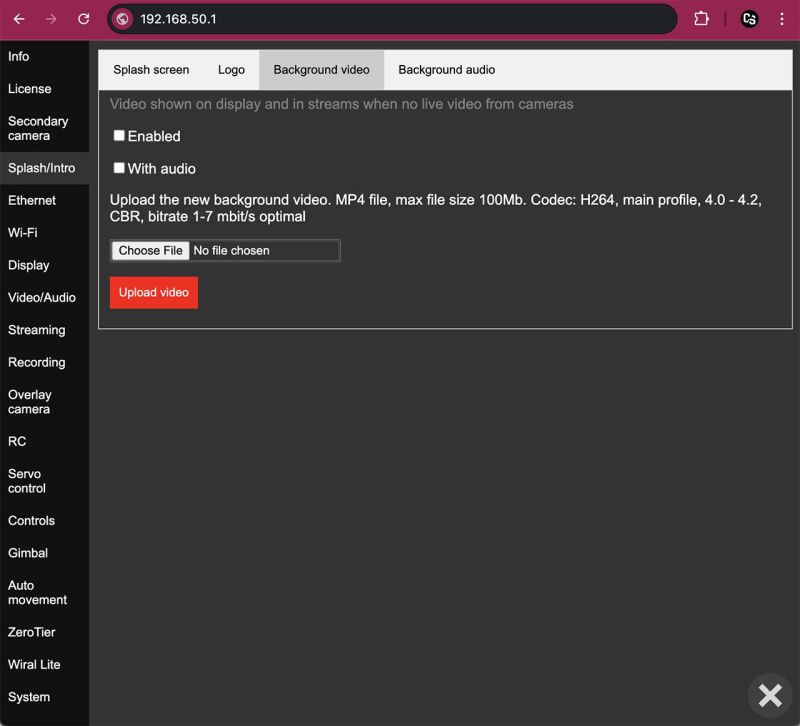
Tab Background video
When video from the main camera is not active (camera disconnected, etc) - background video will be played in the endless loop.
The main idea is that the video stream from the "background video" file follows the same path as the video from the main camera and is decoded by the same display application. However, Cosmostreamer uses two different display applications — one for H.264 video and one for H.265 video. That’s why there are two background videos in Cosmostreamer. The application automatically selects which one to use based on the codec of the most recently active video stream from the main camera.
You could upload a custom video file here. If uploaded video file encoded with H264 codec - it will be used when main stream in H264 codec (for example, with DJI Goggles2/3/Integra/N3 or DJI Goggles V1/V2). If video file encoded with H265 - this will be used when main video stream is in H265 (for example, with DJI Fly drones).
For correct work with Raspberry Pi, H264 encoded file should be encoded with these params:
- Profile: main
- Level 4.0 - 4.2
- Constant bitrate (CBR)
- Bitrate 1 - 7 mbit/s
- Resolution - max 1920x1080
- Frame rate - better to use 50 or 60 fps
- File size: up to 100 Megabytes
For H265 files:
- Resolution - max 1920x1080
- Frame rate - better to use 50 or 60 fps
- File size: up to 100 Megabytes
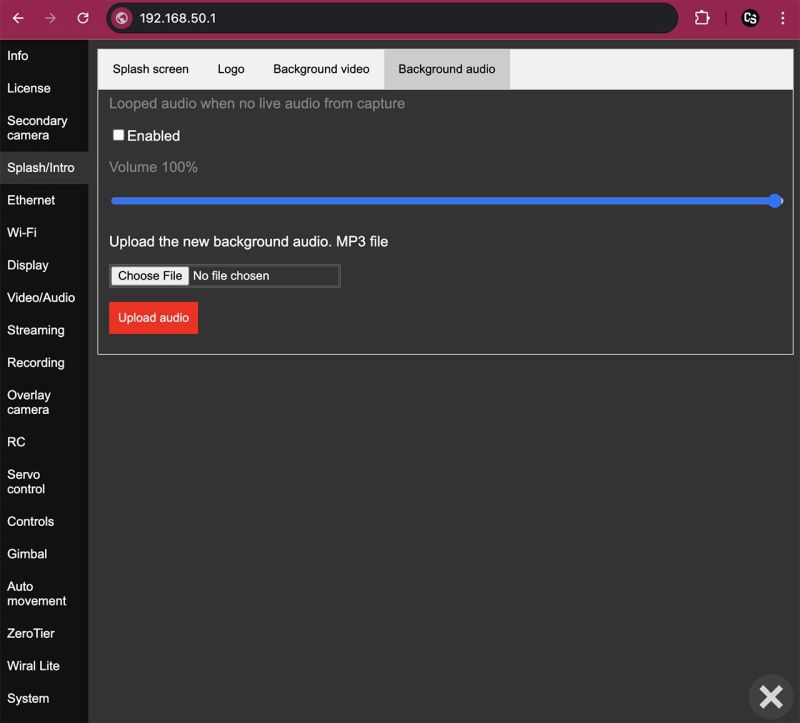
Tab Background audio
Audio from MP3 file will be played in loop and will be mixed together with other audio streams.
I know, on this page written "when no live audio from capture" but this was in the firmware versions older than 0.22.2. In the newer firmware version all audio channels are mixed together.
Ethernet
Only for Raspberry Pi models with Ethernet port (Raspberry Pi 3B/B+, Raspberry Pi 4B).
Ethernet port works by default, need just connect Ethernet cable one side to the Raspberry Pi and another side - to the network switch, router or directly into PC Ethernet port.
Settings on this page is just for static IP configuration on the Ethernet port.
By default, if no static IP enabled, Raspberry PI uses a DHCP to obtain the IP in the local network.
When Ethernet connection is used, web admin page can be opened using http://cosmostreamer.local host.
CosmoViewerNG app should automatically detect Cosmostreamer via Ethernet, no manual actions needed.
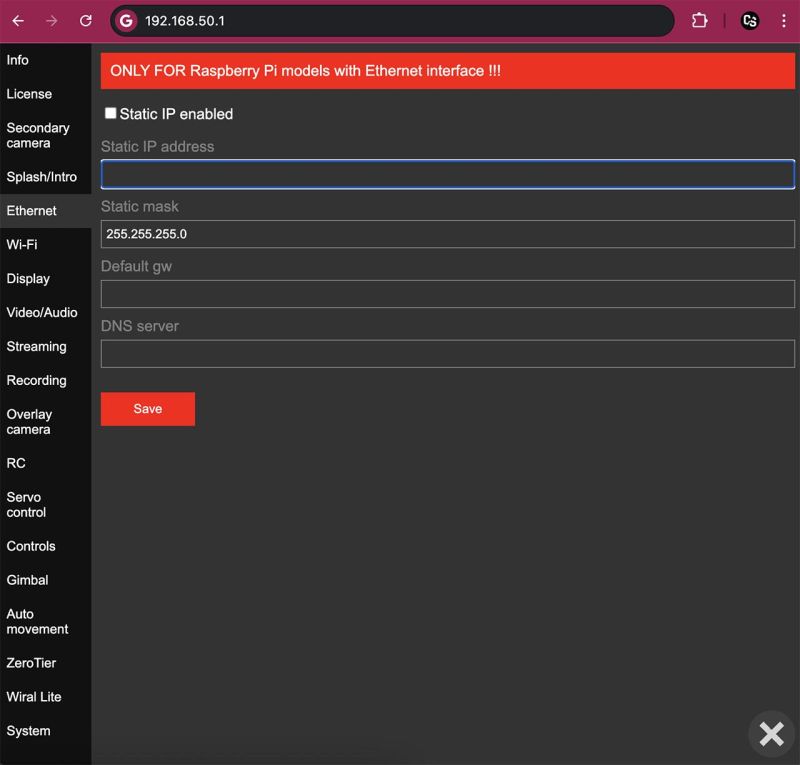
Example values:
Static IP address: 192.168.123
Static mask: 255.255.255.0
Default gw (gateway): 192.168.1.1
DNS server: 192.168.1.1
Another values may be needed for your local network
Wi-Fi
Raspberry Pi microcomputer has internal Wi-Fi interface. This interface can be used as an access point (by default) and also may be used for connection to another Wi-Fi access points or routers.
Also USB Wi-Fi adapters can be used, so it's possible to use internal Wi-Fi as an access point and USB Wi-Fi adapter for local network or camera connection.
Not all USB Wi-Fi adapters are compatible!
For example, this dual-band USB Wi-Fi adapter works fine: https://www.pishop.ca/
Tab Access Point
By default, internal Wi-Fi on the Raspberry Pi configured in Access Point mode. This means you can connect your PC or smartphone to the Cosmostreamer's Wi-Fi access point.
Find Wi-Fi network "cosmostreamer" and connect to it using a default password "1234512345" (without a quotes).
Using a default Wi-Fi password is not secure, anyone (who knows the default password) can connect to your device in this case! Don't forget to change default password.
Also possible to use USB Wi-Fi adapter to use Access Point on it, need just connect compatible USB Wi-Fi adapter to the Raspberry Pi and choose "USB Wi-Fi" instead of "Internal Wi-Fi" in the first field.
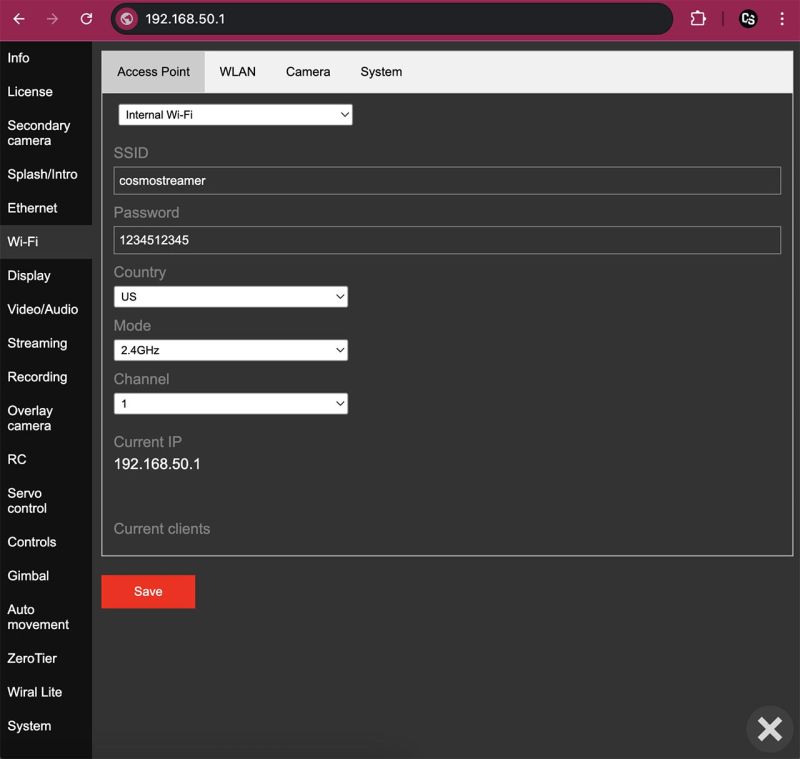
SSID
Wi-Fi network name for access point.
Password
Password for access point access.
Country
There are different channels available for different countried, especially for 5GHz mode.
Mode
Wi-Fi band 2.4GHz or 5GHz.
Raspberry Pi Zero/Zero2 Wi-Fi can work only in 2.4GHz band!
Channel
Wi-Fi channel. Use any channel from this list in 2.4GHz mode. And use 36 or 149 channel in 5GHz mode (as a most compatible).
Tab WLAN
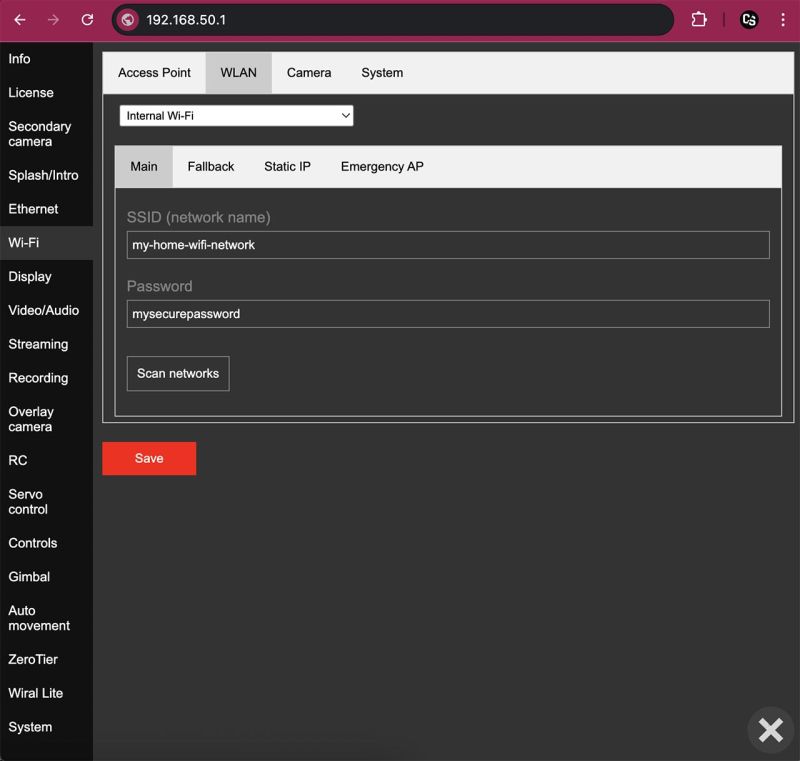
This page is for configuring Wi-Fi interface for connection to any Wi-Fi access point or router.
Need to choose Wi-Fi interface (internal Wi-Fi or USB Wi-Fi adapter).
One interface can be used only for one purpose, either access point or Wlan connection! Not the both at the same time.
Subtab Main
You could fill SSID (Wi-Fi network name) manually, or click button "Scan networks" and you will get the list of available Wi-Fi networks. And enter the correct password for connection to this Wi-Fi network.
Subtab Fallback
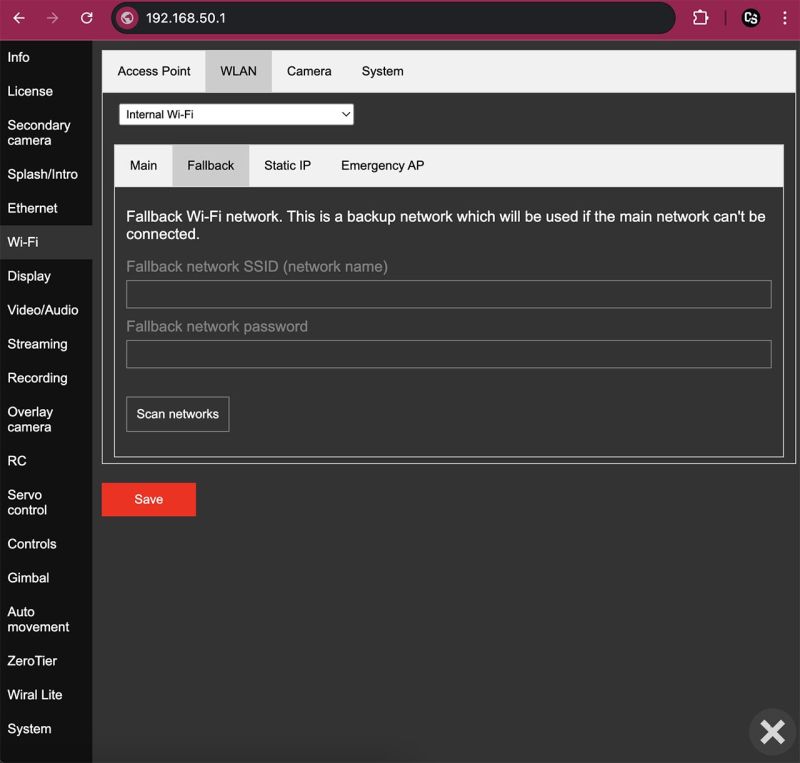
This is just a one more Wi-Fi local network. Cosmostreamer will try to connect to this network if main Wi-Fi network is not available.
Subtab Static IP
Here are just a settings for a static IP on Wi-Fi interface.
Subtab Emergency AP
If this option enabled - Cosmostreamer will enable own Access Point (configured in tab "Access Point") if no connection to configured Wi-Fi network more than 60 seconds.
Tab Camera
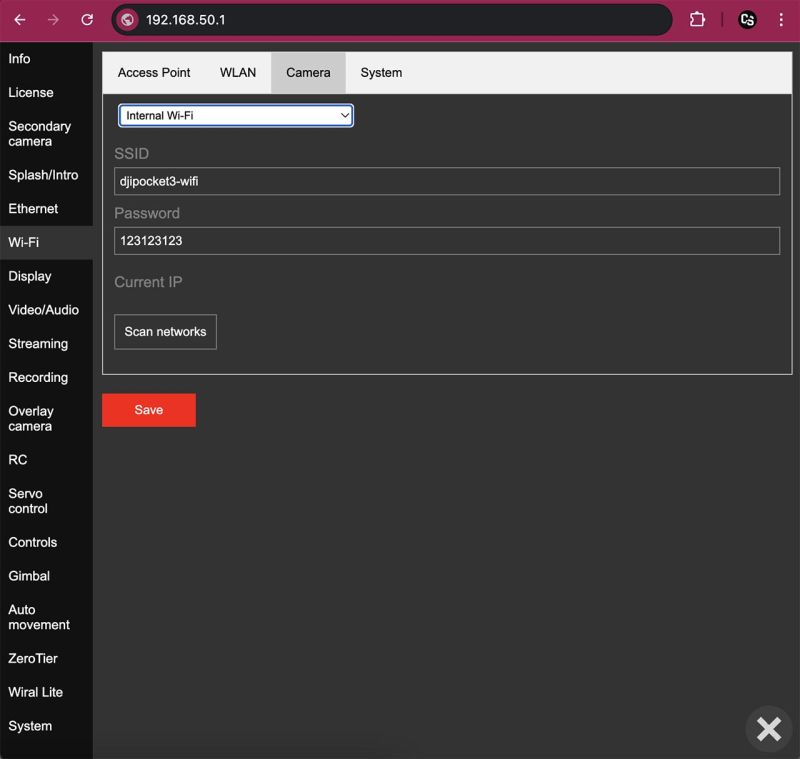
This tab is for configuration a wireless connection to cameras like DJI Pocket3, DJI Action, etc.
Tab System
This tab content is too little for a separate screenshot. It's just a country code for Wi-Fi connection. Leave this by default ("US").
Display
Video/Audio
Streaming
Recording
Overlay camera
RC
Servo control
Controls
Gimbal
Auto movements
Zerotier
Wiral Lite
System
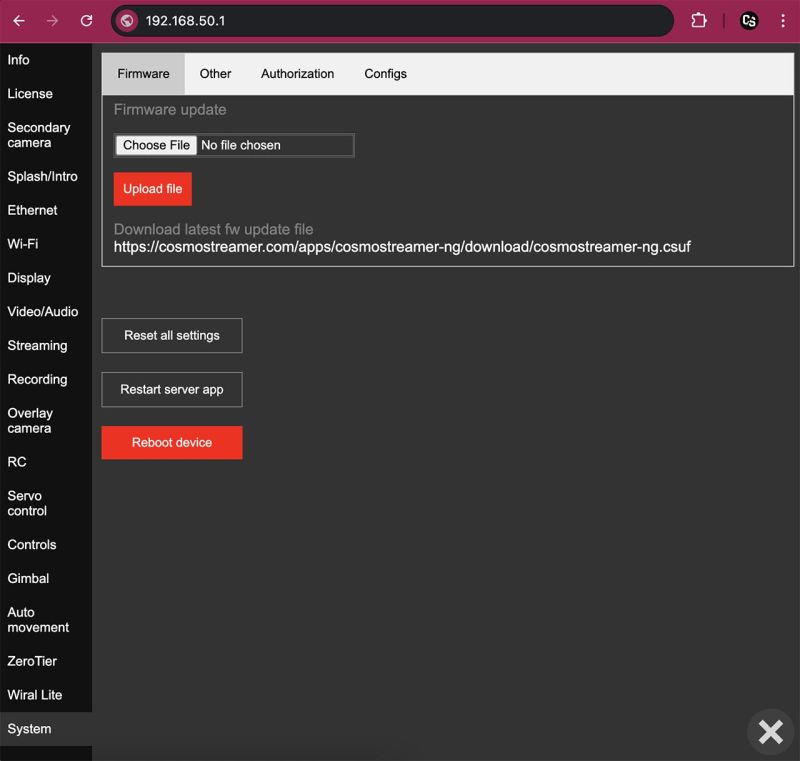
Tab Firmware
This page is for the firmware update.
Download a firmware update file (.csuf), choose this file by clicking button "Choose File" and click "Upload File" button.
Latest Cosmostreamer's firmware update can be downloaded here
In CosmoViewerNG app for Windows possible just click button "Update from server" and latest firmware will be downloaded and installed automatically. But only if PC with runned CosmoViewerNG application is connected to the Internet!
Reset all settings
This button is for resettings all Cosmostreamer's settings to the default.
Restart server app
This button is for restarting main Cosmostreamer application on the Cosmostreamer device. This is mostly for development process.
Reboot device
This button is for Cosmostreamer device reboot.
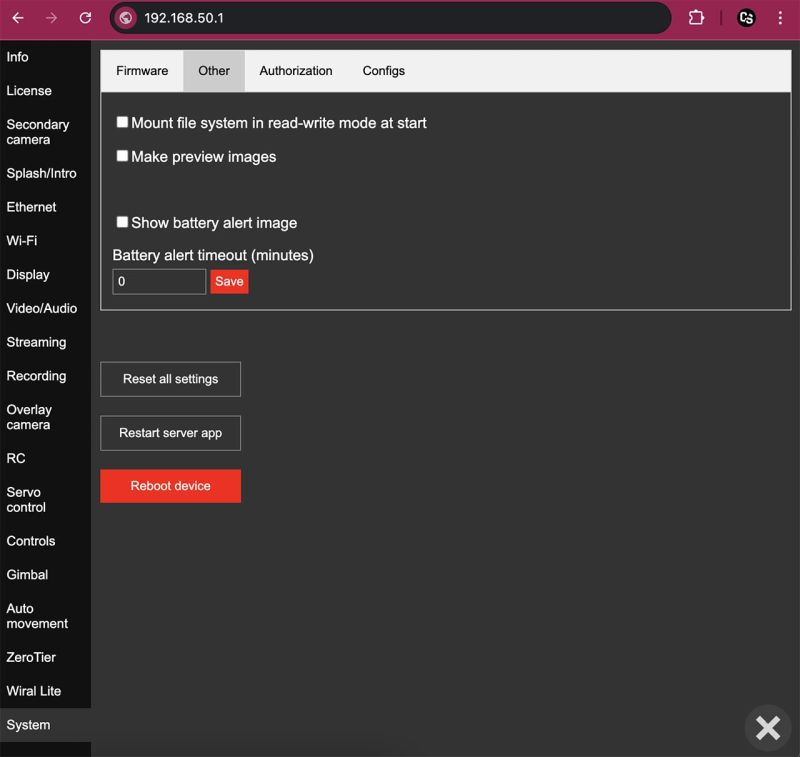
Tab Other
Mount file system in read-write mode at start
By default, the microSD card is in read-only mode to reduce the risk of file system corruption.
You could remount file system into read-write any time by the command via SSH:
For root partition: mount -o rw,remount /
For /boot partition: mount -o rw,remount /boot
Or just enable this option. Root filesystem will be remounted in a read-write mode every time when Cosmostreamer powered on.
Make preview images
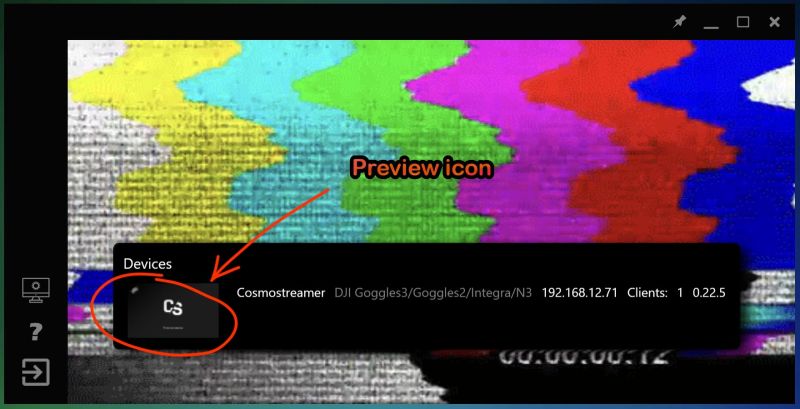
If this option enabled - Cosmostreamer will do a main HDMI display screenshot each 5 seconds and this image will be used as a preview icon in the CosmoViewerNG app for Windows.
This option may cause a HDMI display blinking if a lot of graphical overlays is enabled
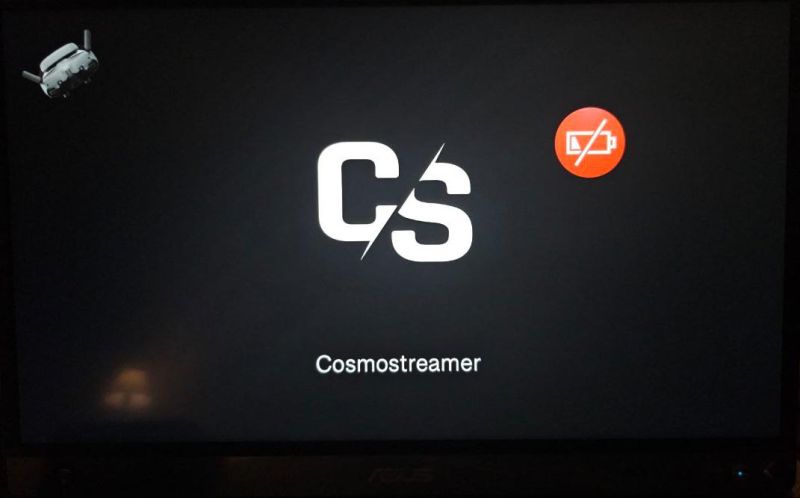
Show battery alert image
If this option is enabled (don't forget also to set timeout value in minutes) - a big red icon will be shown on the main display after this time since Cosmostreamer was powered on.
I.e. if you know approximately how long your Cosmostreamer can run on battery power, enter that time in the settings — once it’s reached, you’ll get an on-screen warning.
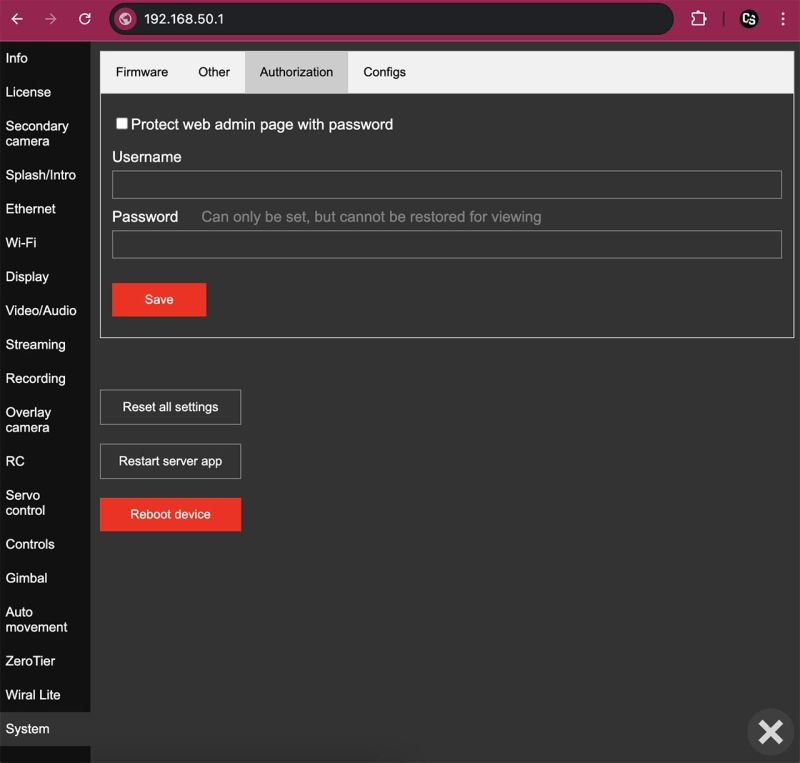
Tab Authorization
If this option enabled (don't forget to fill a "Username" and "Password" fields) - need to enter this when you trying to get access to Cosmostreamer's web interface.
This protection does not work for access from CosmoViewerNG application!
Configs
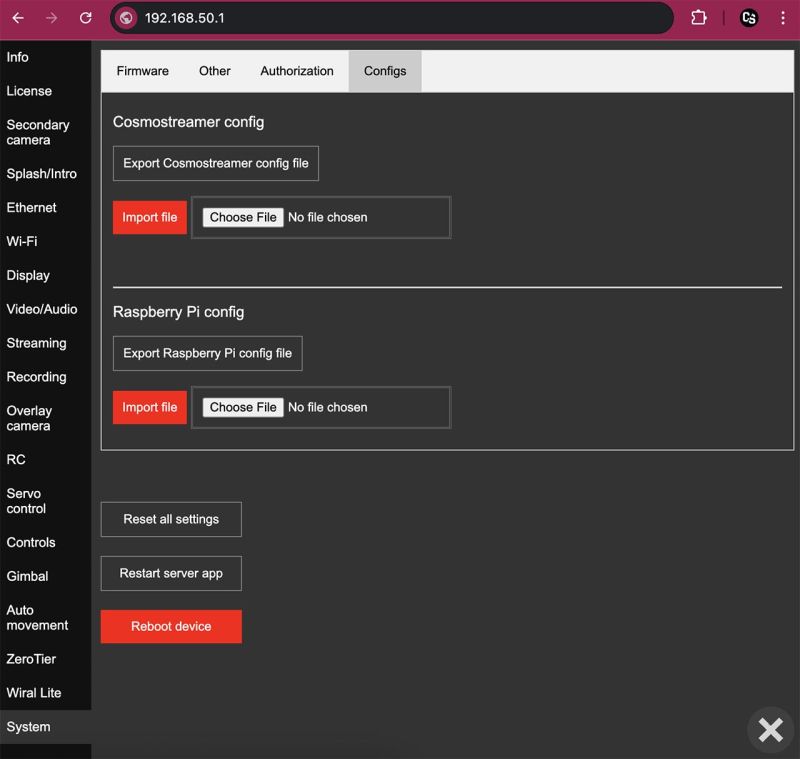
This for export (save from Cosmostreamer to local file on PC) and import (restoring from local file on PC) config files.
There are two config files: a standard config.txt file for Raspberry Pi and cosmostreamer.conf - Cosmostreamer config file.
