Difference between revisions of "Cosmostreamer for DJI Goggles2/Integra"
| Line 51: | Line 51: | ||
===Mac application=== | ===Mac application=== | ||
Download, install and run [https://cosmostreamer.com/apps/cosmoviewer-ng-mac/#download CosmoViewerNG application]. | |||
<br> | <br> | ||
Revision as of 16:21, 10 December 2023
Installing the Cosmostreamer firmware
- Get a blank microSD card of 8GB or larger. Insert the microSD card into the card reader
- Download ZIP-archive with firmware content
- Extract .img file from downloaded ZIP archive
- Use Win32DiskImager on Windows or Balena Etcher on Mac and write .img file on microSD card
- Insert the microSD card into the Raspberry Pi
- If you have a monitor or a TV with HDMI input - plug it to the Raspberry Pi 4B HDMI0- port (nearest to USB-C port)
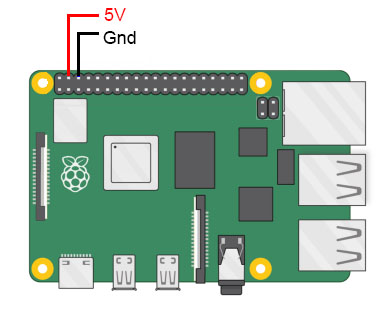
- Plug a standard USB power supply or powerbank to the Raspberry Pi GPIO pins (see chapter "Raspberry Pi power"). Raspberry Pi must start booting. A couple of reboots may be during the first boot process.
Power for Raspberry Pi
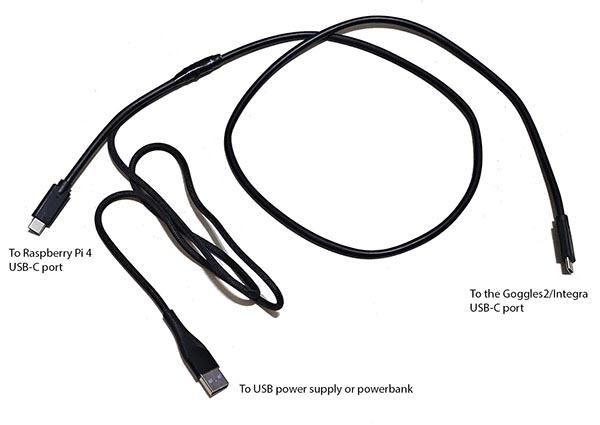
For using with DJI Goggles2/Integra Raspberry Pi 4 must be powered ONLY from GPIO or from PoE or via USB-C port with custom cable.
Power with GPIO (pins)
Use any USB cable, need to cut it and connect to the RPI only 2 wires - Red (5V) and Black (Gnd). Then you can use it with any standard USB power supply or powerbank.

Power with USB-C port
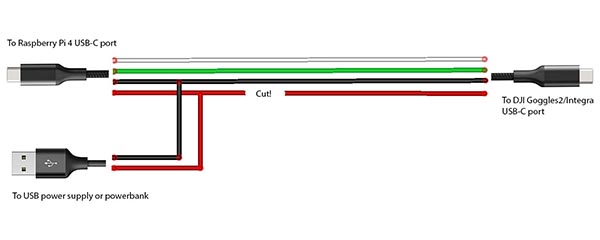
USB-C port on Raspberry Pi 4 is busy by Goggles2/Integra connection, so need to made a custom USB cable with additional part for power.


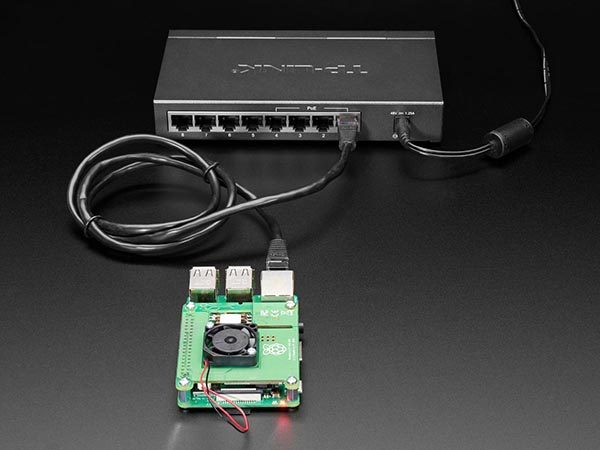
Power with PoE
Only for Raspberry Pi 4B and 3B+. Need to use PoE Hat.

Network connection
Ethernet
Only for Raspberry Pi versions with Ethernet port. Connect Ethernet cable to the Raspberry Pi Ethernet port at one side and home router or PC/Mac Ethernet port on another side
Wi-Fi
Connect your PC/Mac or smartphone to Wi-Fi network cosmostreamer, password 1234512345
Settings and controls
Browser
Windows application
Download, install and run CosmoViewerNG application.
Mac application
Download, install and run CosmoViewerNG application.